最近、Nintendo Switchの「ゼルダ無双 災厄の目次録」というゲームをやって、めちゃくちゃ面白いですが、登場する大妖精というキャラが4人いて名前を覚えられません。
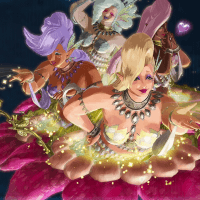
これが大妖精です。初見では色以外の違いがわからないかつ名前が複雑なので、全く名前を覚えられる気がしません。
そこで、Flutterを使用して簡単なクイズアプリを作成することで、全員の名前を覚えることにしました。

Flutterで作る クイズアプリの構成を考える
今回のアプリは任天堂に権利があるものをガチガチに使用しているため、完全に自分用で作成します。
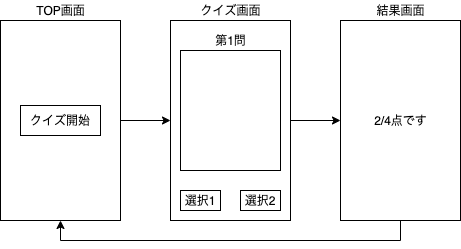
画面遷移はシンプルに以下のようにしました。
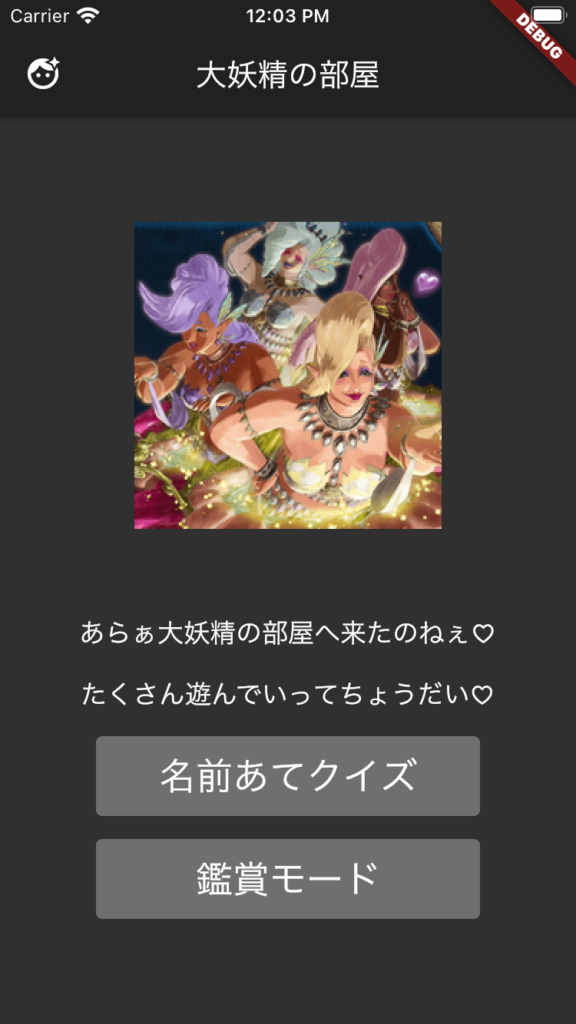
TOP画面を作る
TOP画面から作っていきましょう。
TOP画面はクイズモードに遷移するボタンがあれば良いので非常に簡単です。
画面に並べたい要素を適当に並べています。
ポイントを挙げるとすると、ボタンに「TextButton」を使用している点です。
Flutterのバージョンアップに伴い、FlatButtonなど昔からあったボタンが非推奨になりました。代わりに「TextButton」の使用が推奨されています。
慣れれば良い感じに使えそうです。
class MyHomePage extends HookWidget {
  @override
  Widget build(BuildContext context) {
    return Scaffold(
      appBar: AppBar(
        title: Text("大妖精の部屋"),
        leading: Icon(Icons.face_retouching_natural),
      ),
      body: Center(
        child: Column(
          crossAxisAlignment: CrossAxisAlignment.center,
          mainAxisAlignment: MainAxisAlignment.center,
          children: [
            Image.asset(
              "assets/images/daiyousei.png",
              fit: BoxFit.fill,
            ),
            SizedBox(
              height: 55.0,
            ),
            Text(
              "あらぁ大妖精の部屋へ来たのねぇ♡",
              style: TextStyle(fontSize: 17),
            ),
            SizedBox(
              height: 15.0,
            ),
            Text(
              "たくさん遊んでいってちょうだい♡",
              style: TextStyle(fontSize: 17),
            ),
            SizedBox(
              height: 15.0,
            ),
            TextButton(
              onPressed: () {
                context.read(questionProvider).prepare();
                return Navigator.push(
                    context,
                    MaterialPageRoute(
                      builder: (_) => QuestionScreen(),
                    ));
              },
              child: Text("名前あてクイズ"),
              style: textButtonStyle,
            ),
            SizedBox(
              height: 15.0,
            ),
            TextButton(
              onPressed: () => Navigator.push(
                  context,
                  MaterialPageRoute(
                    builder: (_) => LookScreen(),
                  )),
              child: Text("鑑賞モード"),
              style: textButtonStyle,
            ),
          ],
        ),
      ),
    );
  }
}
final ButtonStyle textButtonStyle = TextButton.styleFrom(
  primary: Colors.white,
  backgroundColor: Colors.white30,
  shadowColor: Colors.redAccent,
  minimumSize: Size(250, 50),
  textStyle: TextStyle(fontSize: 24.0),
);
ということで、こんな感じの画面が出来上がりました。カオスです。
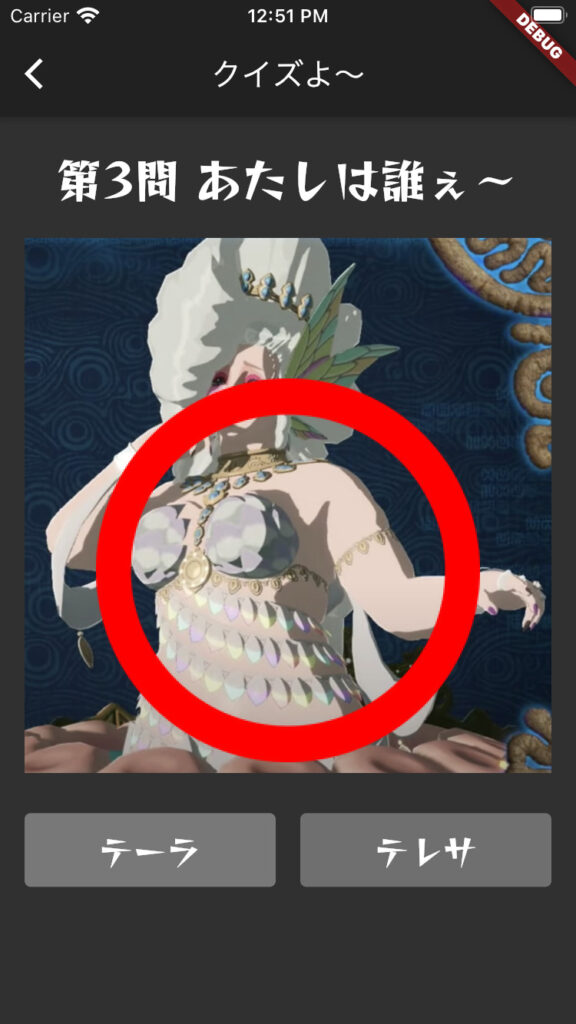
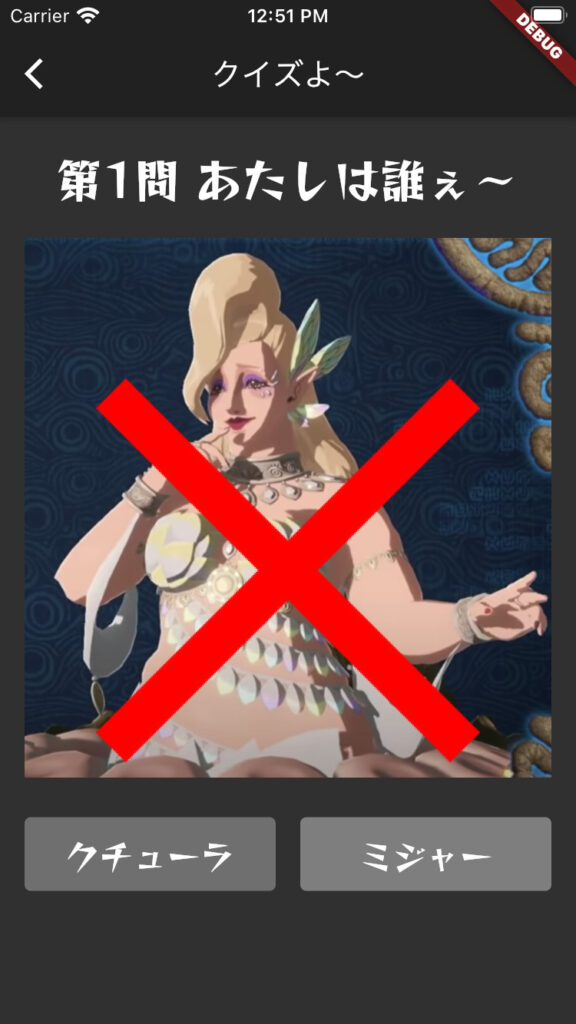
クイズ画面を作る
次はクイズ画面を作っていきましょう。
いうほどではありませんが、ここが一番難しいポイントです。
以下の仕様を盛り込みます。
- 全4問
- 画像と問題と答えを2択で出す
- 回答を選択したら正誤判定する
- ○×を画面に出す
- ピンポン/ブッブー音を鳴らす
- 自動的に次の問題を表示する
画面と処理は分離していきます。状態管理には以下のパッケージを使用しています。
- hooks_riverpod
- flutter_hooks
- flutter_state_notifier
- freezed
※この構成の詳しい使い方は「Flutter Riverpodを使用したカウンターアプリのサンプル」の記事で解説しているので、よろしければご覧ください。

画面は以下のようなコードにしました。処理を分離しているので非常にシンプルにできました。
class QuestionScreen extends HookWidget {
@override
Widget build(BuildContext context) {
final questionNumber = context.read(questionProvider).questionNumberString;
final state = useProvider(questionProvider.state);
return Scaffold(
appBar: AppBar(
title: Text("クイズよ〜"),
),
body: Padding(
padding: const EdgeInsets.all(8.0),
child: Stack(children: [
Column(
crossAxisAlignment: CrossAxisAlignment.center,
children: [
SizedBox(
height: 10.0,
),
Text("第$questionNumber問 あたしは誰ぇ〜", style: lookTextStyle),
SizedBox(
height: 10.0,
),
Padding(
padding: const EdgeInsets.all(8.0),
child: Image.asset(state.currentQuestion.path),
),
SizedBox(
height: 10.0,
),
Row(
mainAxisAlignment: MainAxisAlignment.center,
children: [
AnswerButton(
text: state.currentQuestion.answerList[0],
number: 0,
),
AnswerButton(
text: state.currentQuestion.answerList ,
number: 1,
),
],
),
],
),
state.status == QuestionStatus.WAIT
? Center(
child: Image.asset(state.resultPath),
)
: Container(),
]),
),
);
}
}
,
number: 1,
),
],
),
],
),
state.status == QuestionStatus.WAIT
? Center(
child: Image.asset(state.resultPath),
)
: Container(),
]),
),
);
}
}
処理は以下のようにしました。
結果ページからTOPページに戻りたいので、結果ページに遷移するときには、「pushReplacement」を使います。
final questionProvider =
    StateNotifierProvider.autoDispose((ref) {
  ref.maintainState = true;
  return QuestionController(ref.read);
});

class QuestionController extends StateNotifier<QuestionState> with LocatorMixin {
  QuestionController(this._reader)
      : super(QuestionState(
          correctCount: 0,
          currentQuestion: null,
          currentQuestionResult: 0,
          questionNumber: 1,
          questionOrder: [],
          resultPath: "assets/images/pic_correct.png",
          status: QuestionStatus.ANSWER,
          soundPool: null,
          soundIdCorrect: 0,
          soundIdIncorrect: 0,
          resultComment: "",
        )) {
    prepare();
  }

  String get questionNumberString => state.questionNumber.toString();

  // 問題を初期化する
  Future<void> prepare() async {
    List<int> questionOrder = [0, 1, 2, 3];
    questionOrder.shuffle();

    state = state.copyWith(
      questionOrder: questionOrder,
      currentQuestion: questionList[questionOrder[0]],
      correctCount: 0,
      currentQuestionResult: 0,
      questionNumber: 1,
      status: QuestionStatus.ANSWER,
      resultComment: "",
      soundPool: Soundpool(),
    );

    int soundIdCorrect = await _loadSound("assets/sounds/sound_correct.mp3");
    int soundIdIncorrect = await _loadSound("assets/sounds/sound_incorrect.mp3");
    state = state.copyWith(
      soundIdCorrect: soundIdCorrect,
      soundIdIncorrect: soundIdIncorrect,
    );

  }

  Future<int> _loadSound(String soundPath) async {
    return rootBundle.load(soundPath).then((value) => state.soundPool.load(value));
  }

  Future<void> answer(int number, BuildContext context) async {
    // 答え合わせ
    if (number == state.currentQuestion.correctIndex) {
      state.soundPool.play(state.soundIdCorrect);
      state = state.copyWith(
        correctCount: state.correctCount + 1,
        resultPath: "assets/images/pic_correct.png",
        status: QuestionStatus.WAIT,
      );

    } else {
      state.soundPool.play(state.soundIdIncorrect);
      state = state.copyWith(
        resultPath: "assets/images/pic_incorrect.png",
        status: QuestionStatus.WAIT,
      );
    }

    // 待機
    await Future.delayed(Duration(seconds: 2));

    // 次の問題へ
    if (state.questionNumber == 4) {
      var resultComment = "";
      switch (state.correctCount) {
        case 0:
          resultComment = "だめよ〜";
          break;
        case 1:
          resultComment = "雑魚ね〜";
          break;
        case 2:
          resultComment = "まだまだねぇ〜";
          break;
        case 3:
          resultComment = "後少しねぇ〜";
          break;
        case 4:
          resultComment = "どんだけ〜!";
          break;
        default:
          resultComment = "だめよ〜";
      }
      state = state.copyWith(resultComment: resultComment);
      Navigator.pushReplacement(context, MaterialPageRoute(builder: (context) => ScoreScreen(),));
    } else {
      state = state.copyWith(
        questionNumber: state.questionNumber + 1,
        currentQuestion: questionList[state.questionOrder[state.questionNumber]],
        status: QuestionStatus.ANSWER,
      );
    }
  }

  @override
  void dispose() {
    state.soundPool.release();
    super.dispose();
  }

  final Reader _reader;
}
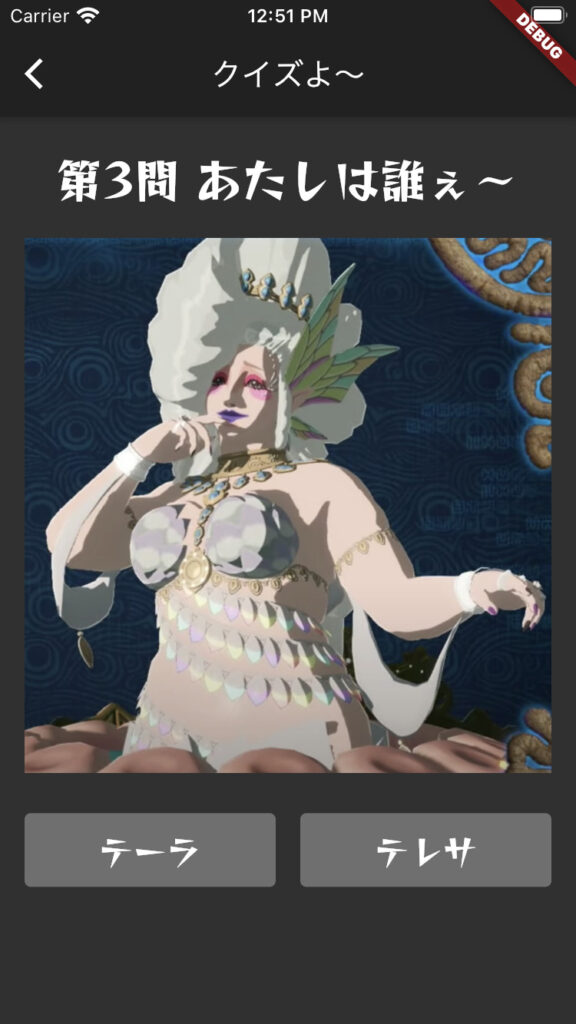
実際に動かしてみると以下のような感じになりました。
いい感じですね!これで名前を覚えるのが簡単になりました!
Google Fontsに最近追加された、「ReggaeOne」というフォントがなんとなくゼルダの伝説感が出ていていい感じでオススメです!
結果ページを作る
最後は結果ページです。
もうおまけみたいな感じですが、やっていきます。
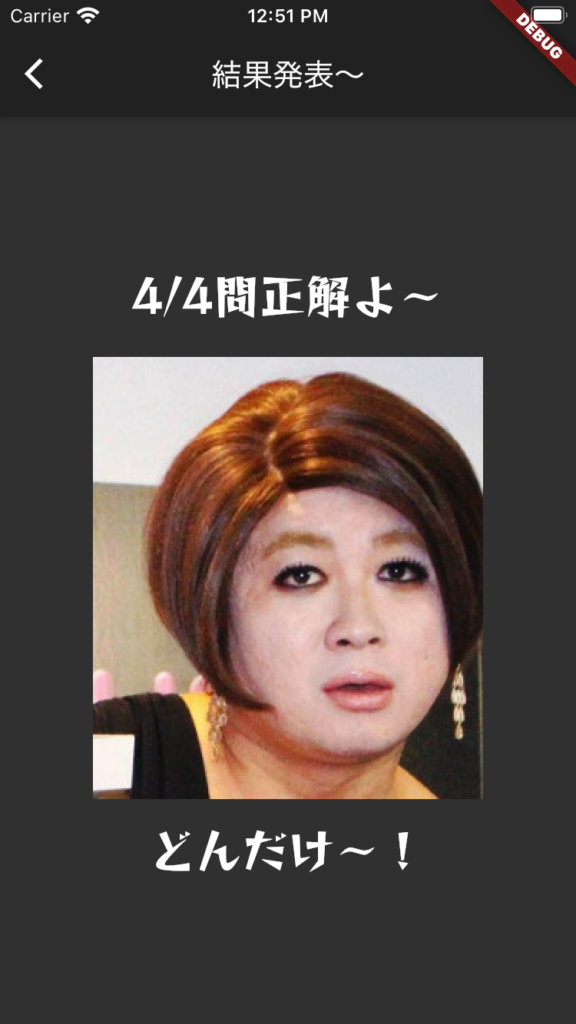
結果ページでは、クイズで正解した数と、それに応じたコメントを出していきます。
せっかくなので、全問正解した時にはIKKOさんのどんだけ〜!の画像を出します。
class ScoreScreen extends HookWidget {
  @override
  Widget build(BuildContext context) {
    final state = useProvider(questionProvider.state);
    return Scaffold(
      appBar: AppBar(
        title: Text("結果発表〜"),
      ),
      body: Center(
        child: Column(
          mainAxisAlignment: MainAxisAlignment.center,
          children: [
            Text("${state.correctCount}/4問正解よ〜", style: lookTextStyle,),
            SizedBox(height: 20,),
            state.correctCount == 4 ? Image.asset("assets/images/ikko.png") : Container(),
            SizedBox(height: 10,),
            Text(state.resultComment, style: lookTextStyle,),
          ],
        ),
      ),
    );
  }
}
全問正解したときの画面は以下のようになります。
まとめ
Flutterを使用して、シンプルなクイズアプリを作成してみました。
ソースコード全体は私のGithubにアップしています。
余談ですが私は仕事でスマホアプリを作成したことがありません。
しかし、Flutterを使ってみたところ、そんな私でもスマホアプリが作成できてしまいました。
激熱なFlutterを学習するためにオススメな情報を、以下にまとめているのでよろしければご覧になってください。
Flutter学習情報
Flutterを勉強するのに最適な参考書は、以下の「基礎から学ぶFlutter」です。
環境構築から、Dart/Flutterの基本/テストやパフォーマンスチューニングまで一通り学ぶことができます。

また、当ブログではFlutterを初心者が学ぶためにオススメな方法を「Flutter を初心者が学ぶおすすめの勉強法!【間違いない動画があります】」という記事で公開していますので、Flutterに興味がある方は是非読んでみてください。